以为会系列——CoordinatorLayout
引言
作为一名社会编程人员,每天面对茫茫多的知识,常常感觉大脑内存不够,运行卡顿,所以需要记在“硬盘”上,时不时在需要时翻阅一下。
因此从本篇开始,开启一个《以为会系列》,记录自己日常开发中用的比较少的一类知识点,但也很重要的一些。这些都是自己实际工作中的一些实际感受总结来的,希望对看到的各位有所帮助。
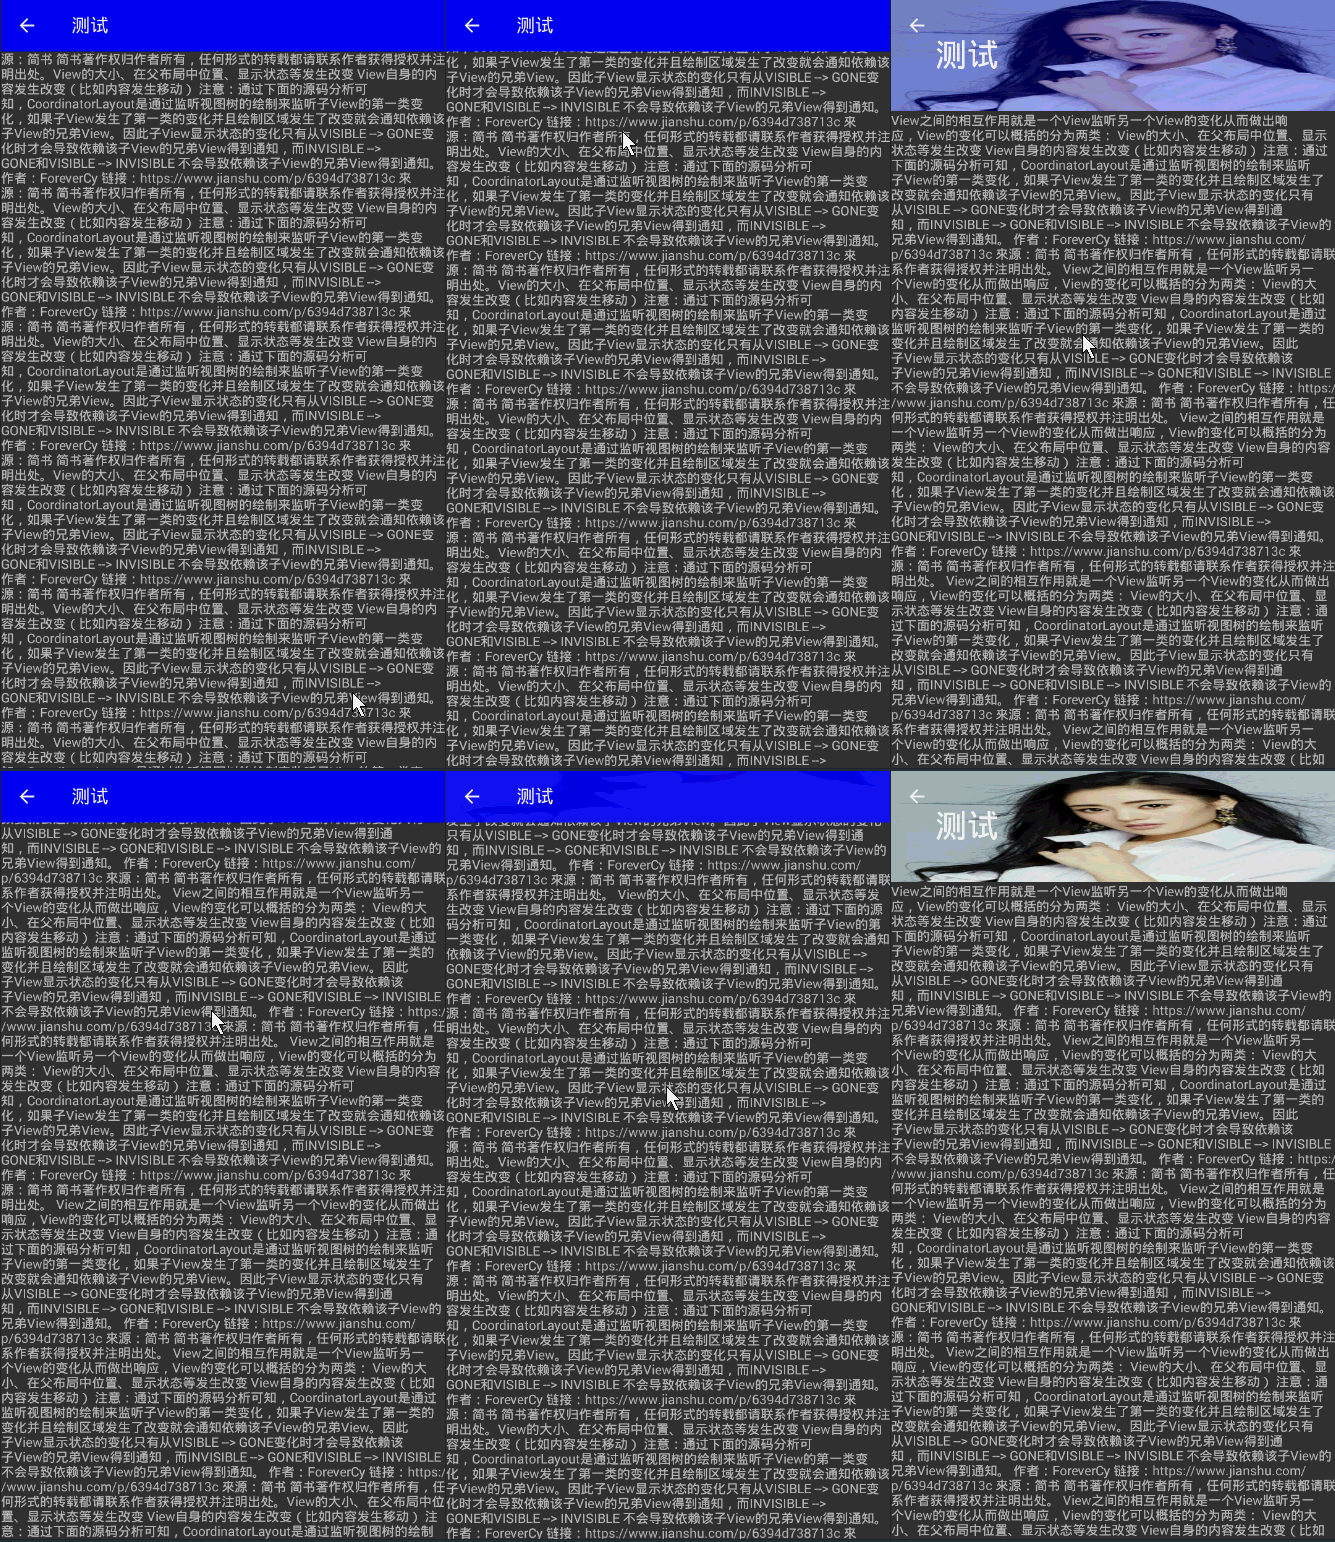
进入正题,这篇讲述一下,平时用的较少,但很有用,很有逼格的一个布局——CoordinatorLayout。为啥说它的使用很有逼格呢,看看下面的效果图:
PS:CoodinatorLayout是不支持ListView和ScrollView的,我在这个坑里滞留了好久!!!
CoodinatorLayout 属性
CoordinatorLayout是一个特殊ViewGroup,它的类定义如下:1
public class CoordinatorLayout extends ViewGroup implements NestedScrollingParent2
在官网上我们也可以看到一句话“CoordinatorLayout is a super-powered FrameLayout”,说明我们可以像用FrameLayout一样使用它。但是它有一些特殊的属性,它的一些强大的功能就是依赖于此。如下,罗列了一些它提供的属性,从源码对应的R文件中查看它定义的属性,这样会比较全。这里会说明常用的属性:1
2
3
4
5
6
7
8
9
10
11
12
13
14
15
16
17
18//用在它子View上的属性,用法如:“app:layout_behavior=""”(请学会举一反三)
/*就是layout_gravity属性*/
public static final int CoordinatorLayout_Layout_android_layout_gravity = 0;
/*设置依赖的View*/
public static final int CoordinatorLayout_Layout_layout_anchor = 2;
/*设置相对于依赖View的位置*/
public static final int CoordinatorLayout_Layout_layout_anchorGrav= 4;
/*定义behavior*/
public static final int CoordinatorLayout_Layout_layout_behavior = 1;
/*找了一些资料,没看明白*/
public static final int CoordinatorLayout_Layout_layout_dodgeInsetEdges = 6;
public static final int CoordinatorLayout_Layout_layout_insetEdge = 5;
public static final int CoordinatorLayout_Layout_layout_keyline = 3;
//用在它自身的属性 用法如:“app:statusBarBackground=""”
public static final int CoordinatorLayout_keylines = 0;
/*状态栏背景,实现沉浸式Style*/
public static final int CoordinatorLayout_statusBarBackground = 1;
CoodinatorLayout 布局用法
首先,在用之前要添加依赖,CoordinatorLayout是design包里的控件,所以使用之前添加如下依赖:1
compile 'com.android.support:design:26.0.0'
常规用法
直接上代码:1
2
3
4
5
6
7
8
9
10
11
12
13
14
15
16
17
18
19
20
21
22
23
24
25
26
27
28<?xml version="1.0" encoding="utf-8"?>
<android.support.design.widget.CoordinatorLayout
xmlns:android="http://schemas.android.com/apk/res/android"
xmlns:app="http://schemas.android.com/apk/res-auto"
app:statusBarBackground="@android:color/white"
android:layout_width="match_parent"
android:layout_height="match_parent">
<!--标准的头部-->
<android.support.design.widget.AppBarLayout
android:layout_width="match_parent"
android:layout_height="wrap_content">
<android.support.design.widget.CollapsingToolbarLayout
android:layout_width="match_parent"
android:layout_height="wrap_content">
<android.support.v7.widget.Toolbar
android:layout_width="match_parent"
android:layout_height="?attr/actionBarSize">
</android.support.v7.widget.Toolbar>
</android.support.design.widget.CollapsingToolbarLayout>
</android.support.design.widget.AppBarLayout>
<!--这里可以替换为任何你想放置的View(能够响应滑动的View,如RecycleView等)-->
<View
android:layout_width="match_parent"
android:layout_height="match_parent"/>
</android.support.design.widget.CoordinatorLayout>
AppBarLayout
它本身是一个纵向的LinearLayout,提供了许多样式属性,具体可以查看源码,不做过多说明。有一个提供给它的子View的属性,可以了解一下:
layout_scrollFlags,对应的值为:scroll,enterAlways,enterAlwaysCollapsed,snap,exitUntilCollapsed;
scroll:就是响应CoordinatorLayout里的滚动事件,不加此属性,会驻留,不滚动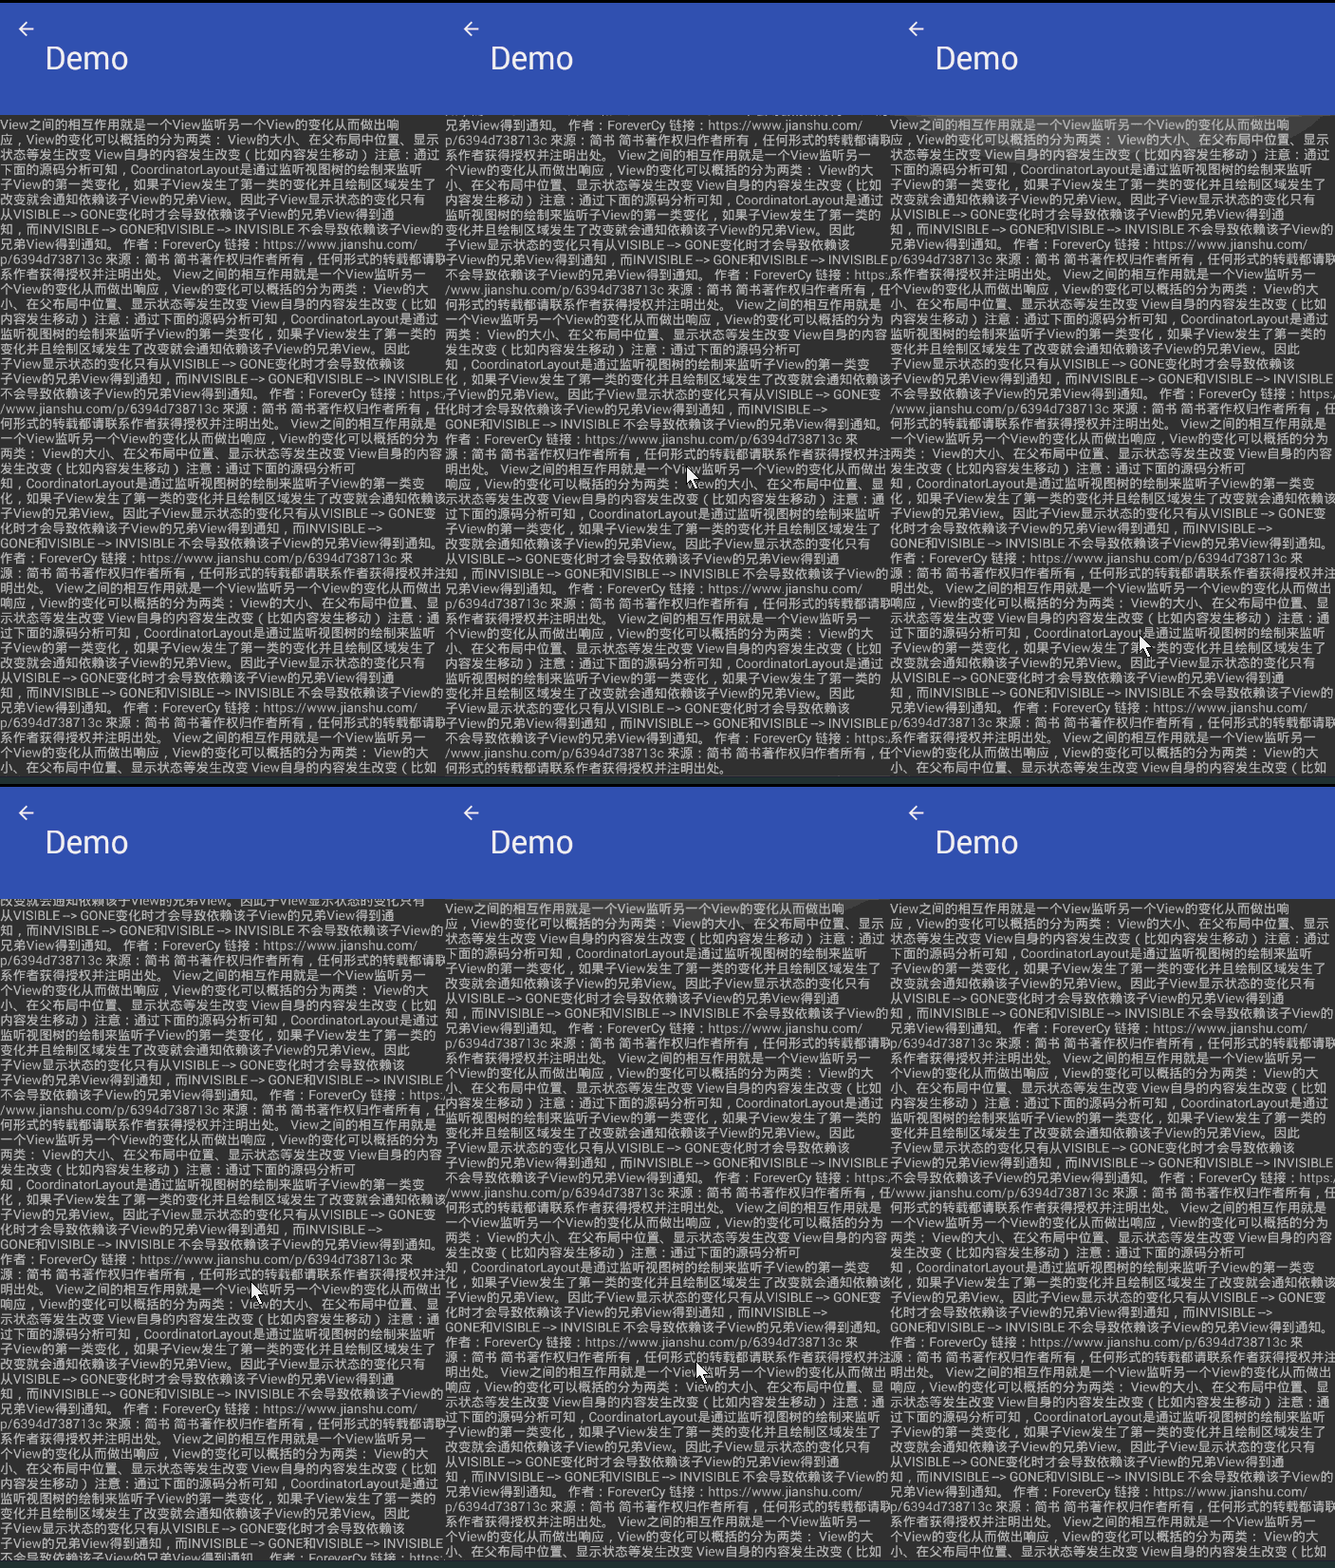
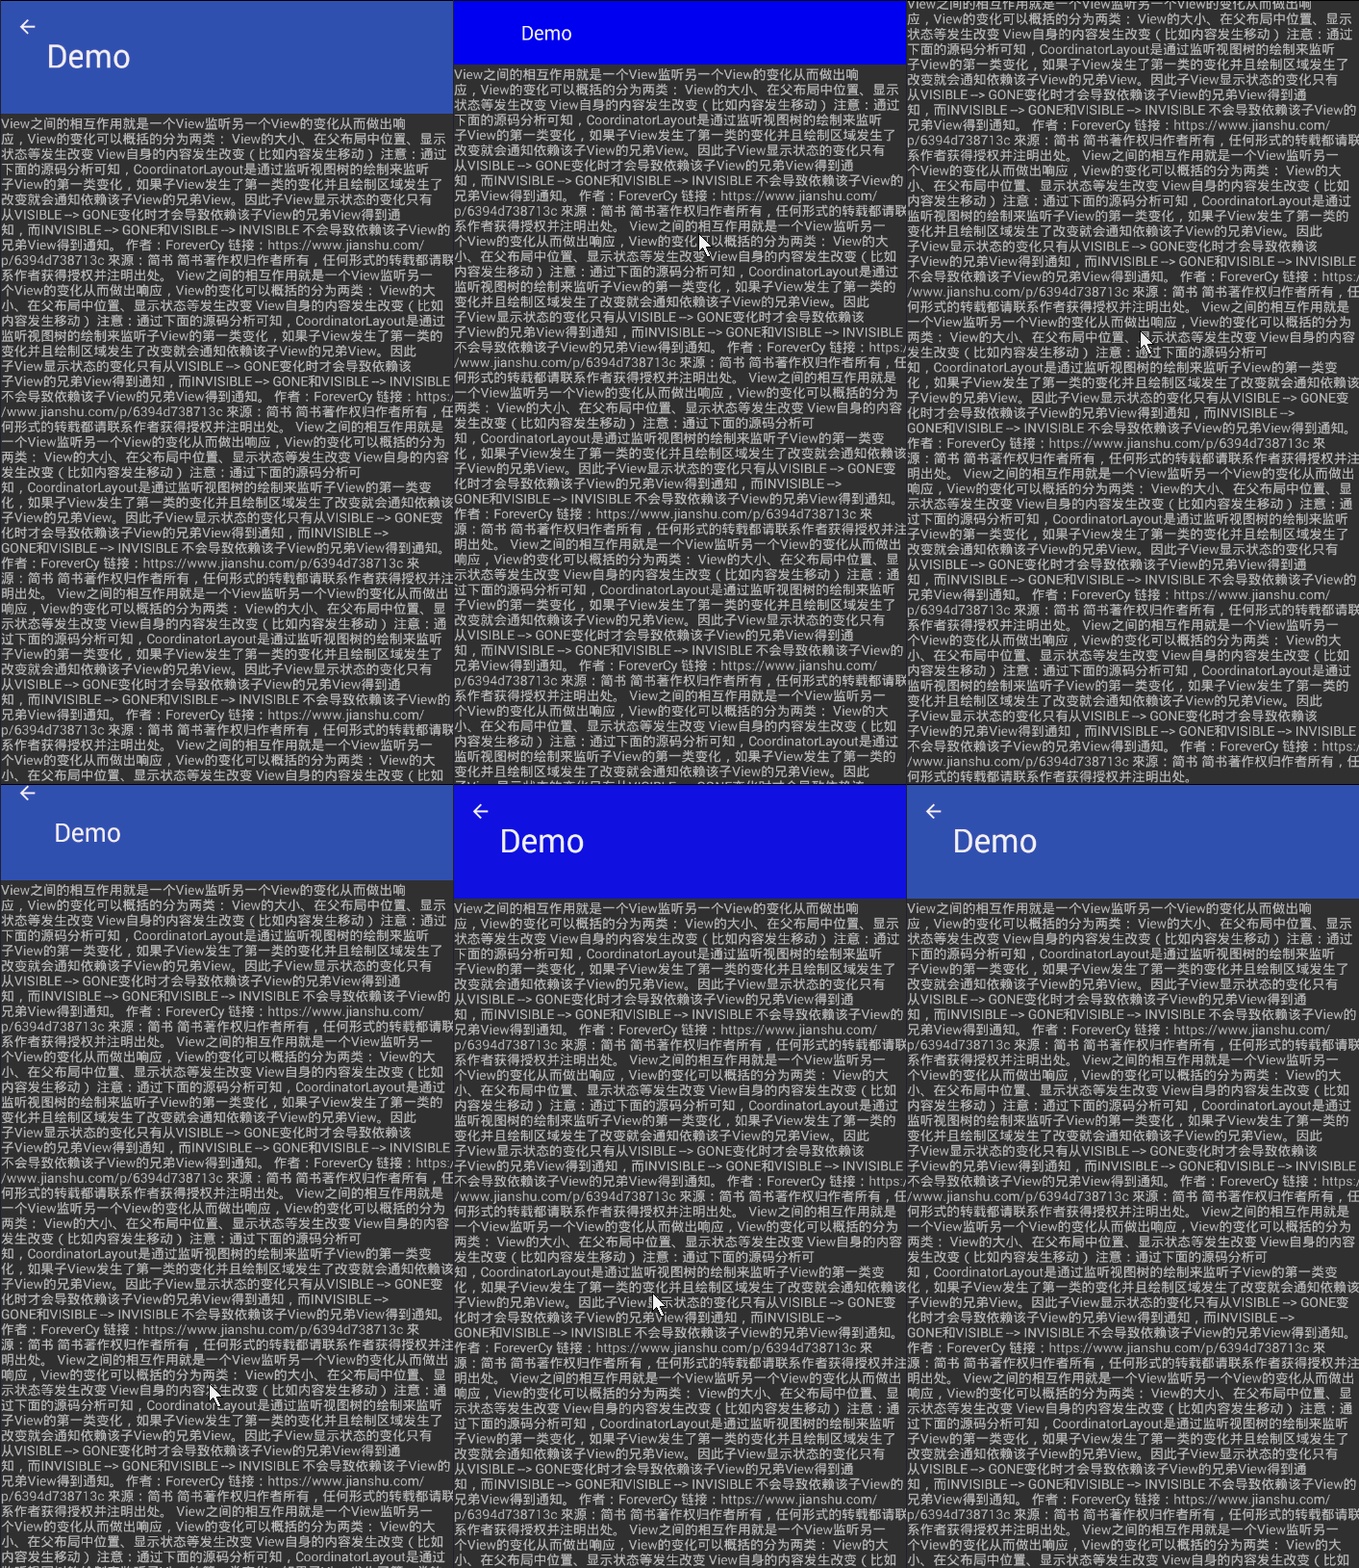
enterAlways:使用此属性(scroll|enterAlways),表示在下滑进入显示时,优先滑动头部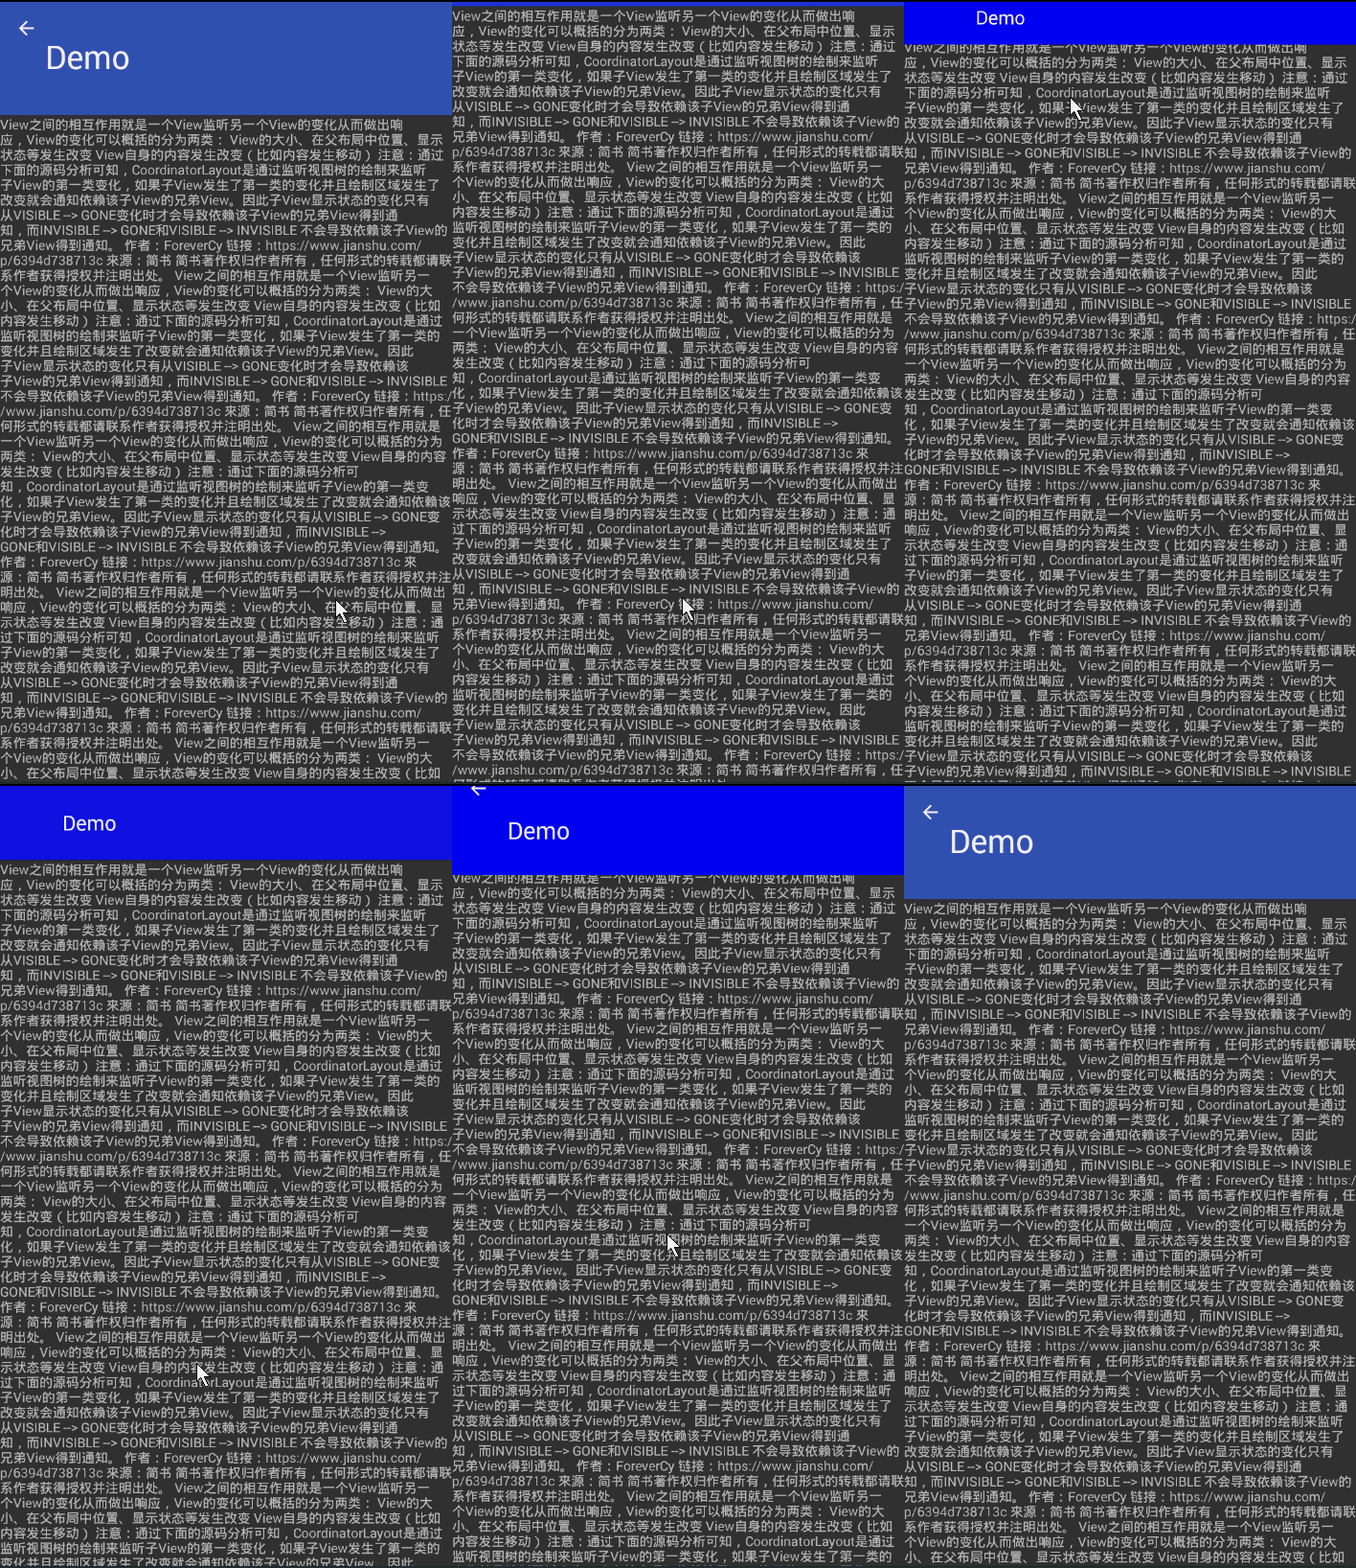
enterAlwaysCollapsed:使用此属性(scroll|enterAlways|enterAlwaysCollapsed),表示在下滑进入显示时,优先滑动折叠式头部,再滑动列表,最后展开头部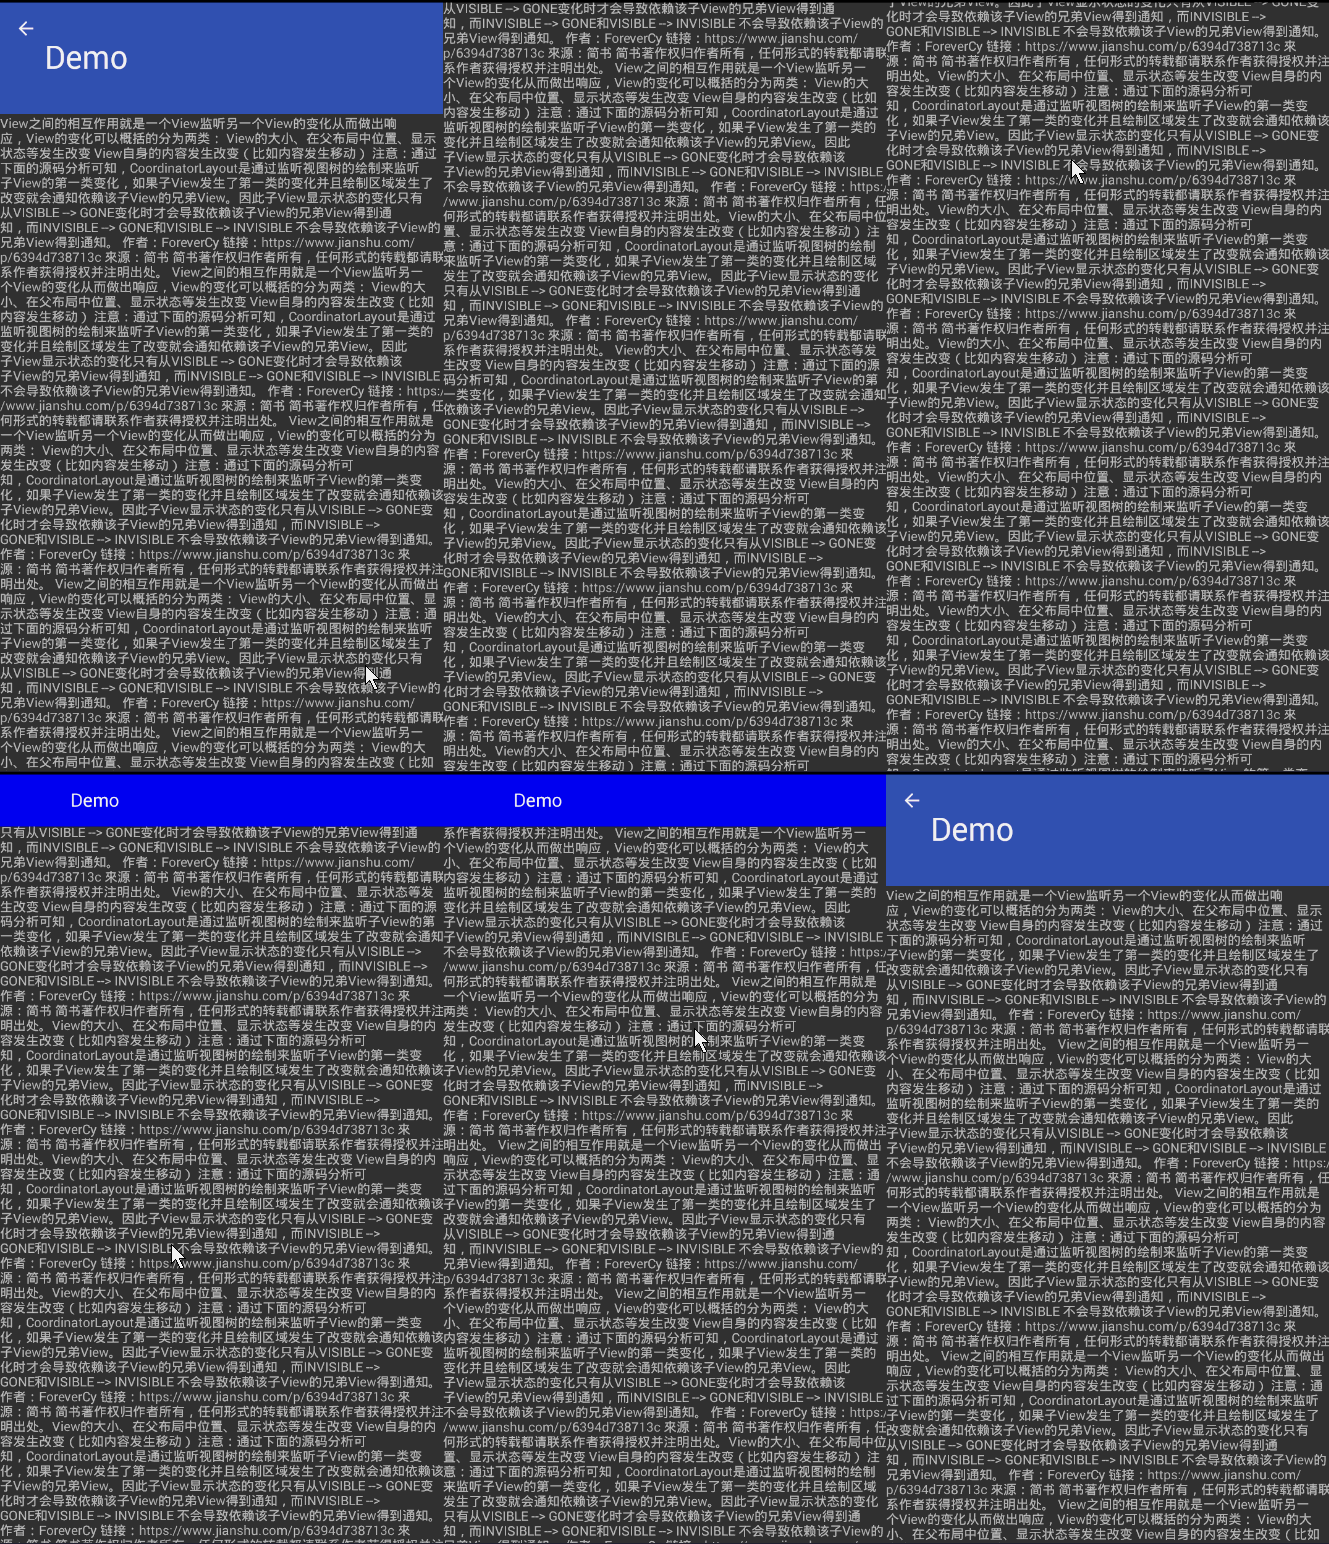
exitUntilCollapsed:使用此属性(scroll|exitUntilCollapsed),表示上滑时,折叠后的头部,一直存在。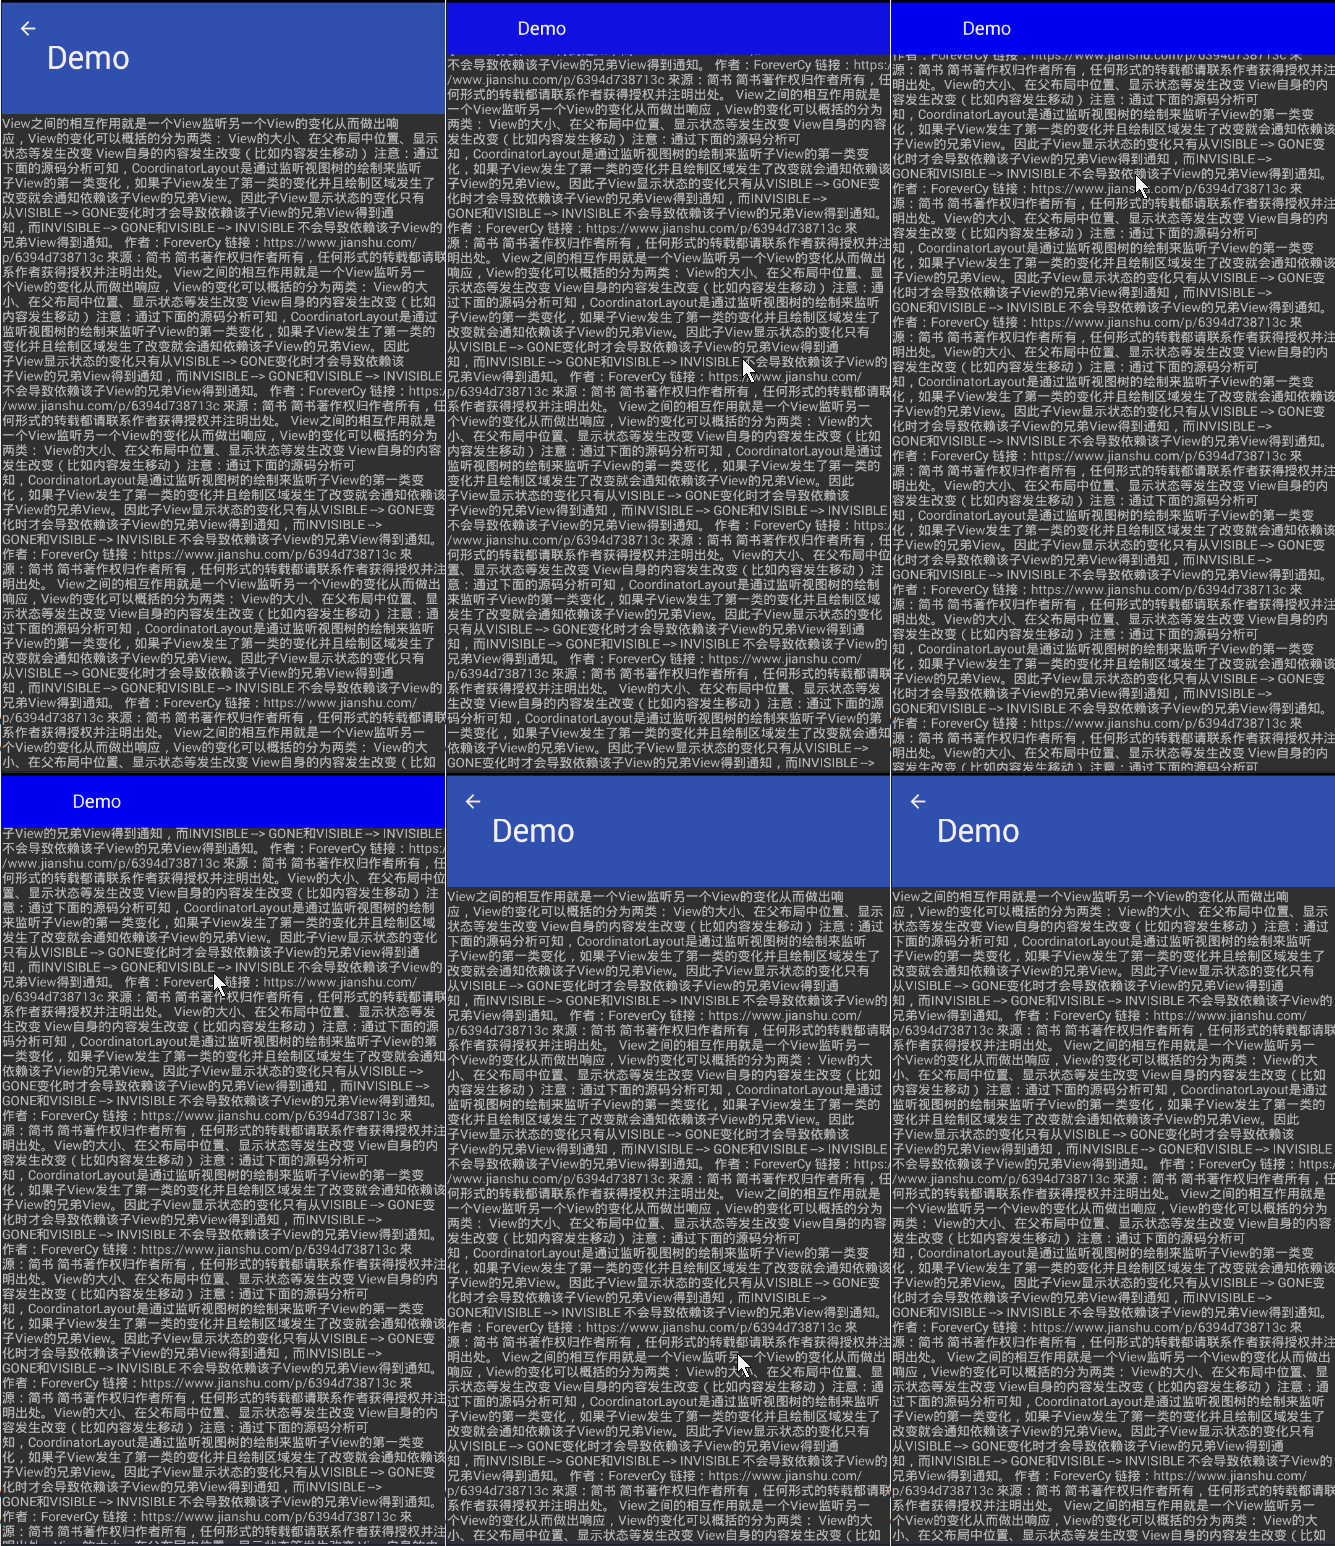
snap:此属性可以搭配上面任意属性,表示不允许停留在中间状态
CollapsingToolbarLayout
它实质是一个FrameLayout,从名字上可以意会为可折叠的Toolbar布局,它的属性几个可以了解一波:
app:contentScrim:折叠之后toolbar的颜色
app:scrimAnimationDuration:视差效果渐变动画时间
app:layout_collapseMode:用于它的子View,折叠模式,取值可以是none/pin/parallax,这里直接给出一份常用配置,这么用就好了,因为我每个组合都试过。
app:title: 就是header里的大标题
app:toolbar: 指定toolbar,貌似没啥效果,默认要toolbar放第二个view才可以,其它属性看名字就能理解的。看下面的示例代码1
2
3
4
5
6
7
8
9
10
11
12
13
14
15
16
17
18
19
20
21
22
23
24
25
26
27
28
29
30<android.support.design.widget.CollapsingToolbarLayout
app:contentScrim="@color/blue"
app:expandedTitleGravity="left"
app:collapsedTitleGravity="left"
app:expandedTitleMargin="48dp"
app:title="测试"
app:scrimAnimationDuration="1000"
app:toolbarId="@+id/toolbar"
app:layout_scrollFlags="scroll|exitUntilCollapsed|snap"
android:background="@color/colorPrimary"
android:layout_width="match_parent"
android:layout_height="120dp">
<!--这个ImageView可以换成你自己想要的任何可折叠头部-->
<ImageView
app:layout_collapseMode="parallax"
app:layout_collapseParallaxMultiplier="0"
android:scaleType="fitXY"
android:src="@mipmap/image"
android:layout_width="match_parent"
android:layout_height="match_parent" />
<android.support.v7.widget.Toolbar
app:contentInsetStart="0dp"
app:layout_collapseMode="pin"
app:theme="@style/OverFlowMenuTheme"
android:id="@+id/toolbar"
android:layout_width="match_parent"
android:layout_height="56dp">
</android.support.v7.widget.Toolbar>
</p>
最后,贴一下完整代码:1
2
3
4
5
6
7
8
9
10
11
12
13
14
15
16
17
18
19
20
21
22
23
24
25
26
27
28
29
30
31
32
33
34
35
36
37
38
39
40
41
42
43
44
45
46
47
48
49
50
51
52
53
54
55
56
57
58<?xml version="1.0" encoding="utf-8"?>
<android.support.design.widget.CoordinatorLayout
xmlns:android="http://schemas.android.com/apk/res/android"
xmlns:app="http://schemas.android.com/apk/res-auto"
android:layout_width="match_parent"
android:layout_height="match_parent">
<android.support.design.widget.AppBarLayout
android:layout_width="match_parent"
android:fitsSystemWindows="true"
android:theme="@style/ThemeOverlay.AppCompat.Dark.ActionBar"
android:layout_height="wrap_content">
<android.support.design.widget.CollapsingToolbarLayout
app:contentScrim="@color/blue"
app:expandedTitleGravity="left"
app:collapsedTitleGravity="left"
app:expandedTitleMargin="48dp"
app:title="测试"
app:scrimAnimationDuration="1000"
app:toolbarId="@+id/toolbar"
app:layout_scrollFlags="scroll|exitUntilCollapsed|snap"
android:background="@color/colorPrimary"
android:layout_width="match_parent"
android:layout_height="120dp">
<ImageView
app:layout_collapseMode="parallax"
app:layout_collapseParallaxMultiplier="0"
android:scaleType="fitXY"
android:src="@mipmap/image"
android:layout_width="match_parent"
android:layout_height="match_parent" />
<android.support.v7.widget.Toolbar
app:contentInsetStart="0dp"
app:layout_collapseMode="pin"
app:contentInsetStartWithNavigation="5dp"
app:navigationIcon="@mipmap/icon"
app:theme="@style/OverFlowMenuTheme"
android:id="@+id/toolbar"
android:layout_width="match_parent"
android:layout_height="56dp">
</android.support.v7.widget.Toolbar>
</android.support.design.widget.CollapsingToolbarLayout>
</android.support.design.widget.AppBarLayout>
<android.support.v4.widget.NestedScrollView
android:id="@+id/lv"
app:layout_behavior="@string/appbar_scrolling_view_behavior"
android:layout_width="match_parent"
android:layout_height="match_parent">
<TextView
android:text="@string/text"
android:layout_width="match_parent"
android:layout_height="match_parent" />
</android.support.v4.widget.NestedScrollView>
</android.support.design.widget.CoordinatorLayout>
app:layout_behavior=”@string/appbar_scrolling_view_behavior” 这一句就是普通用法的关键,本质是用了AppBarLayout提供的一个Behavior;
ToolBar
ToolBar我认为是没啥好说的,就是一个Toolbar,它的属性也是看名字就能理解的。
app:contentInsetStartWithNavigation=”5dp” 标题距离返回箭头的距离
app:navigationIcon=”@mipmap/icon” 指定返回按钮的资源
定制用法
上面提到了AppBarLayout提供的Behavior,如果我们要使用定制用法,就得自己自定义Behavior。基本如下,Behavior1
2
3
4public class CustomBehavior extends CoordinatorLayout.Behavior<RecyclerView> {
}
然后就是根据自己的需求,复写需要的方法,这里简单的罗列了一些经常用的:1
2
3
4
5
6
7
8
9
10
11
12
13
14
15
16
17
18
19
20
21
22
23
24
25
26
27
28
29
30
31
32
33
34
35
36
37
38
39
40
41public class CustomBehavior extends CoordinatorLayout.Behavior<RecyclerView> {
/**
* 指定哪些View响应变化
* @param parent
* @param child
* @param dependency
* @return
*/
@Override
public boolean layoutDependsOn(CoordinatorLayout parent, RecyclerView child, View dependency) {
return super.layoutDependsOn(parent, child, dependency);
}
/**
* 当View变化时,执行哪些操作
* @param parent
* @param child
* @param dependency
* @return
*/
@Override
public boolean onDependentViewChanged(CoordinatorLayout parent, RecyclerView child, View dependency) {
return super.onDependentViewChanged(parent, child, dependency);
}
/**
* 来筛选响应哪种滑动,有垂直方向 和水平方向的滑动
* @param coordinatorLayout
* @param child
* @param directTargetChild
* @param target
* @param axes
* @param type
* @return
*/
@Override
public boolean onStartNestedScroll(@NonNull CoordinatorLayout coordinatorLayout, @NonNull RecyclerView child, @NonNull View directTargetChild, @NonNull View target, int axes, int type) {
return super.onStartNestedScroll(coordinatorLayout, child, directTargetChild, target, axes, type);
}
}
时间关系,定制的方式暂时不去深究了,日后需要时,再深入研究!!
欢迎大家,一起来探讨技术!!!
